What is the terminal anyways?
The terminal (or command prompt, cmd, the command line, command line interface [CLI], or many other names) is one of the most nitty-gritty ways that you can interact with your computer. It’s a text-based interface, allowing you to navigate around and interact with your computer purely with a keyboard. This is actually how you used to have to use a computer, before the mouse was invented.
Getting to know your computer can actually be incredibly powerful and can allow a whole new world of customization and capabilities for your computer. There are thousands of incredibly powerful programs that can only be run from the command line, for instance, youtube-dl (the most powerful and only open source youtube to mp3 program that I know of) is at this point only usable through the CLI. You can automate simple repetitive tasks, and quickly navigate through your computer in a way that is simply not possible through a traditional GUI (graphical user interface). Plus, you get to look like a movie hacker.
In this guide I’m going to try to get you to at least start on the command line, in hopes of getting everyone to realize how cool it is, and to try to get everyone connected to the newly started Handmade Web pubnix!
Woah wait, hold up, what’s a pubnix?
This is gonna take a little bit of explaining, but bear with me. Assuming you know at least a little bit about computers because you’re in this class, I’m going to assume you know what an operating system is. The two most common OSes are obviously Windows and macOS, but in reality there’s actually hundreds and hundreds more. Most of these remaining ones fall under the umbrella of Linux operating systems, which I am not going to go super in depth about. But the most important thing here to note, is that all of these operating systems came out of one really old operating system developed in the 60s and 70s called UNIX. It was the first of its kind, a multi-user multitasking operating system that for the time, was unimaginably powerful. UNIX was distributed and developed upon, and formed the base of both Microsoft Windows (which has now completely moved on from the UNIX substructure) and macOS (which remains on a heavily modified version of the UNIX structure). Linux operating systems are now the most pure distillation of the original UNIX system, obviously further developed for the modern age, but they remain its closest living relatives.
A pubnix, is a portmanteau of “public” and “UNIX” and has come to mean a publicly-accessible UNIX computer, hosted on a server somewhere on the internet. These computers and their resultant communities are the descendants of the original bulletin board systems of the early web, and are still thriving today. People are able to log into these computers from anywhere in the world with an internet connection and talk, create, code, dream, and commiserate with like-minded people from all over, all through a terminal. It’s a truly amazing section of the web that I cannot even begin to describe, but I hope that I can get something going for you all here.
But first, some terminal-ology
The terminal is a bit intimidating at first, but I promise you, it’s actually way less intimidating than it looks. I will be using the terms shell and terminal interchangeably. They essentially mean the same thing, but you will find shell used much more commonly in more technical spheres.
A note: These basic commands will work across any terminal or operating system, but as we move further into the guide here, especially once we get to the actual connection to the pubnix, you’re going to want to be using a UNIX based terminal. (You can tell you’re in a UNIX [or Bourne] shell if the character at the start of your line is a “$”
- For Linux users: you don’t have to do anything, yay!
- For macOS users: The default shell on newer (Mojave and later) macOS versions is a weird proprietary Apple shell called zsh. This will work for everything, in theory, but I vastly prefer to use the Bourne Again Shell (bash) which is the default on a vast, vast majority of Linux systems. You can change the default shell by typing chsh -s /bin/bash into your terminal on your Mac. It’ll give you a little annoying warning every time you start the terminal, but nothing bad will actually happen.
- For Windows users: Since Microsoft switched off UNIX for the architecture for its Windows operating system, the default shell (command prompt) is no longer a Bourne shell. Because of this, you will have to download and use a third party shell emulator to properly use many of the things we are about to discuss. Some of the most popular ones are Git BASH (which comes packaged with Git For Windows) or Cmder. Windows does apparently have a native way to enable a Linux shell over the default Command Prompt interface (instructions here) but I’ve never actually used it, so proceed with caution.
A further note: have used all three operating systems in the past and have a fair amount of experience with all three, but I happen to be writing this tutorial on a Mac. So for convenience’s sake, I will be taking screenshots from my own terminal here. As such, it might look slightly different than yours, but if the text is the same, you’re in the same place.
The basic terminal layout and navigation
Pulling up your terminal, if you’re using a proper bash terminal you’ll see something that looks a little like this.
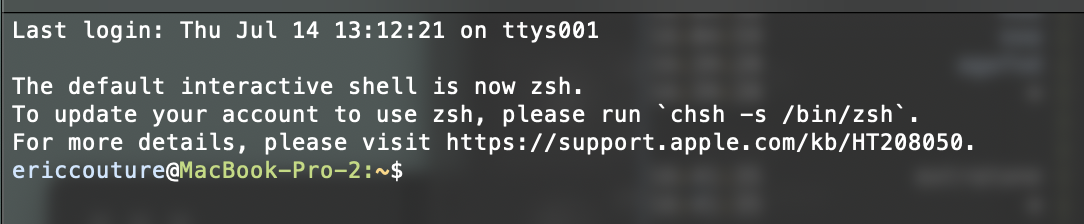
At the very least, you’ll see the bit at the bottom, your username on your computer @ your computer and then the $ we discussed before. An important thing to note here is the small ~ before the $. This indicates that we are currently located in the default terminal directory. This is different on different operating systems, but for Macs is your home directory for your account. It’s not captured in this screenshot, but you should see a cursor blinking right after the $. You can type some stuff now! Try hitting enter! You’ll probably get an invalid command message, but hey! You’re doing it!
A pretty key piece of information about the terminal. When executing commands in the terminal, all commands are executed relative to where you are located in the filesystem at the time of executing the command. This is hands down the most important thing to understand, but because we’ve already been working a lot with HTML and CSS filesystems, it probably makes sense. Now, you could just type a long file path every time you want to execute a command, but that gets tiring after maybe three commands at the MOST. As such, it’s time to learn our first terminal commands to help us get around!
First, let's get our bearings. Type ls into your terminal and hit enter.

ls stands for “list” and it will list all the directories and files in the current directory. This is a very handy command, especially if you’re not quite sure where you are or where to go, it’s very helpful. Now let’s say we wanted to move into our Documents directory to do something there, type cd Documents (this stands for “change directory”) and then press enter.

Our terminal didn’t give us any feedback as it did with the previous command, but we can see that something still changed! Where we just had the ~ before, there is now a visual indicator of where we are in our filesystem. The yellow text here shows us exactly the file location we are currently in, this will update as we move around! It’s a very helpful thing to keep track of where we are. But, if you get very lost at some point, the command pwd (which stands for “print working directory”) will do exactly that. It will print the full file path of where you’re currently located in your file system.

A lot of the things we’ve learned so far in our class also apply here. If I want to go back a level in my file system, I use .. the same way we would when referencing a file in HTML.

And, if I know the exact directory I want to get to even if it’s several levels deep, I can type the whole file path out to get there in one command as opposed to one for each level.

And one last trick, if at any point you want to get out of wherever you are and get back to your home directory, all you have to do is type cd ~ and it’ll bring you right back to where you started.

Intro to command structure
I won’t go too in depth here, this gets into a little bit more advanced territory that isn’t super relevant here, yet. The basic structure for terminal commands is what we’ve seen previously, typically [command] [target file or location]. This is as basic as it gets, and can get dramatically more complicated depending on what you want to do. Shell commands are read in the same way that browsers read HTML and CSS documents, without spaces or the like, so you can write incredibly complicated commands all in one line if you really really wanted to. Often, if you’re reading tutorials you will see lots of one or two (or sometimes even more) letter strings preceded by a dash “-” (as seen in this screenshot taken from a DigitalOcean tutorial)

These things are called arguments and they play a key role in the versatility of commands in the shell. They expand each command, allowing you to modify its behavior and pass in all sorts of data. We’ll encounter a couple of examples of this later. Don’t worry about it for now.
If you get lost…
In the terminal, it is very easy to get confused and disoriented. All of the commands look the same, and sometimes it’s a bit hard to keep track of what you’re up to. A couple tips:
This is dependent on the terminal, but in most cases, if you press the up and down arrow buttons, you can scroll through the commands you’ve previously executed. If you’re executing a bunch of similar looking commands or following a tutorial, this can be a very helpful way to find your place again.
The man command is your friend. It stands for “manual” and will give you a full documentation of the command that you follow it with. For example, if we wanted a full documentation of the usage and arguments available for the list command, we’d type man ls and we’d get this monstrosity.
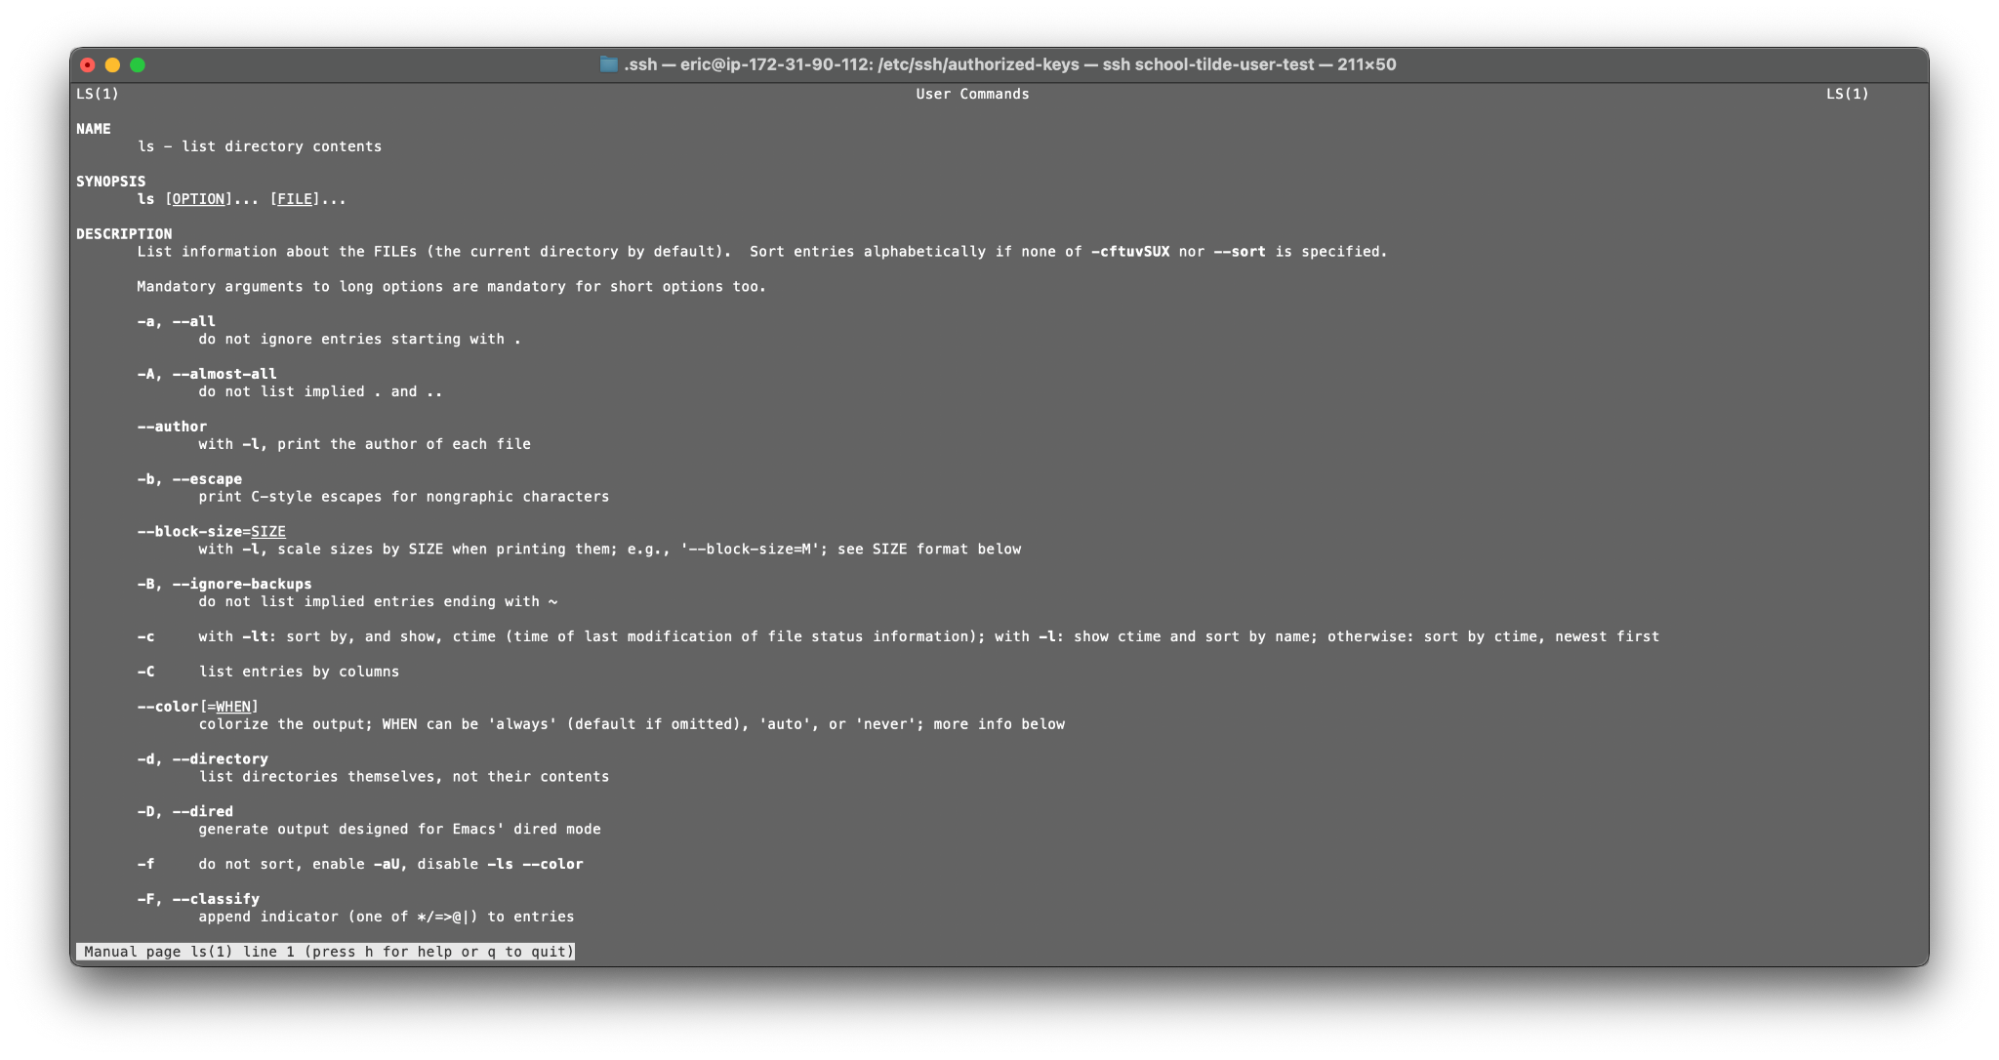
Reading these manual pages in the terminal is an absolute nightmare, and luckily we have the marvel of the modern internet, and can read these somewhere else. They can be helpful in a pinch if you forget exactly what a command does, but if you want a reasonably formatted resource to be able to reference https://ss64.com is an absolutely glorious website brought to my attention by our lovely professor. It hosts full documentation for default terminal capabilities. Plus, tons of resources for each command to boot. Terminals are hard, use your resources! We’re almost to the actual handmade web pubnix, bear with me! But first, some ground rules.
Public UNIX server etiquette
A public Unix server is usually a computer that someone is volunteering to share with other people. The maintenance of the computer requires time, keeping the computer on the internet and accessible to users costs money, and resources, such as RAM, CPU, and storage space are limited.
This document provides a list of recommendations for people who use public Unix servers
- Do not assume gender. If you don't know someone's pronouns, ask them.
- Do not pirate data. Regardless of your politics on piracy, you are putting the owner of the public Unix server at risk, because it is them who is being seen on the outside.
- Avoid hogging resources such as RAM, CPU, and storage space on your public Unix server. This is unfair for other users, and is also at the expense of the public Unix server's owner.
- Do not mine cryptocurrency. This hogs resources.
- Avoid downloading as best as you can. The public Unix server's owner has to pay bills for your bandwidth usage.
- Do not post chat messages publicly without permission. Some people rant and fume, and don't want their messages being displayed publicly. It could cost them their job.
- Do not call the police in case of a suicide mention.
(stolen shamelessly from https://tilde.town/wiki/public-unix-server-etiquette.html my own home tilde, under cc-by-sa)
Now that we’re through with that, let's get on with the fun stuff!
How do you actually connect to the server?
We’ll be using a little thing called SSH (secure shell) protocol to connect into the shared public server. SSH allows you to create a secure tunnel into a remote computer or server through a shell, and to open a shell on that remote computer. It’s a protocol used EXTENSIVELY since its advent in 1995, and is active on some level in almost every single piece of the internet you use today.
Using your terminal, you will SSH (it’s a verb too) into the remote handmade web pubnix server. I don’t have to get into the details here, but we’re going to use something called public-private key encryption. You have a private key stored on your local computer, that you DO NOT SHARE!!!! UNDER ANY CIRCUMSTANCES!!!!!! And a corresponding public key that you distribute wherever you need encryption. These two keys are generated at the same time, and using all sorts of complicated math I don’t really understand, correspond to each other. This encryption method has a TON of applications, and is used all over the place, but in this situation it will work as follows.
Before we actually get started, you’re going to have to generate a keypair. There are tons of good guides on this topic already, so I’m not really going to bother writing it all out. This guide from tilde.club see note here works well and is very simple to follow. This is a platform specific guide, and it has you name all your files after tilde.club, but you can feel free to name them whatever you’d like, just don’t add spaces. It’s typical to name your keys after the platform they’re used on, in our situation, you might want to name them “handmade-web.club” or something related. It’s truly up to you!
SOME NOTES ON ISSUES I'VE COME ACROSS TROUBLESHOOTING CONNECTION WITH OTHERS:
- The Linux subsystem for windows is really strange, if you choose to use that you may run into some issues that I’ve never seen before, no guarantee we can work through them
- One thing in particular, if you’re getting an error telling you your private key file is unprotected, try running the command we’re about to go over with sudo in front of it, this stands for “superuser do” and executes the command with the highest privileges possible, this does seem to get around some issues
- The subsystem appears to interact strangely with file permissions, when creating the .ssh directory according to the guides, omit the -m 700 argument, this will counteract that. Or, it should.
- It seems that cmder has neither of these issues, fun how that works.
- Some guides for windows will tell you to generate your keys using PuTTYgen, this appears to create keys that just straight up don’t work on the server, for whatever reason. Whoops. I think there’s something I’m probably doing incorrectly, or could set up to fix this, but that’s for later. For now, generate them on the command line using the commands outlined in the guides! Make sure your key looks like the one I have below, if it looks dramatically different it’s probably not going to work.
Before trying to get on the server, you’re going to have to give me (your friendly neighborhood server admin) your public key, please send it to me on discord along with your preferred username! To actually see what your public key looks like, you’re going to want to make sure you’re in your .ssh directory and then use the command cat [public key file name]. The cat command spits out the contents of any file directly into the terminal. It seems kind of boring but it’s actually incredibly powerful when it comes to shell scripting, you can figure that out on your own if you are so inclined. But in our situation, you’re going to want to copy the long string of gibberish it spits out into the terminal IN ITS ENTIRETY. INCLUDING THE BITS AT THE BEGINNING AND END. It’ll look something like this.
ssh-rsa
AAAAB3NzaC1yc2EAAAADAQABAAABAQCj55/vIz/0pHJYJbSA9ybvMbYM03sWxV2w63qBC2VdJ+ynjequ/u01LsnPlfisyGSz/Ygo1GKm6XihK3Qf666ANB5Y6qKGzhjkf/AdJEOsx3veqYCMZduy3N2wVrxbYjFZ/4SrIpgxqr0iVGd7eo3dLpaGp+3FT6KeBzLpTE4PnCI43AVr4f8bUZBDkInjFLNE84Xphx+nTVa7Ms0eS9gBc1fSCHeWIQ67iyssyvV9at+io0mFihM0lNYMK3H7pUJeSUNL1Ehu7QNBYSUy7eBTTqBGfYdOX+Xsg4b8TG96ZHDiz3kVk7QP/0O4Xac2vSLSMqEowJQCawgO9nmGLZW5 ericcouture@MacBook-Pro-2.local
It doesn’t look like anything, it’s not supposed to, don’t worry. I just need the text of it! Send it over to me, and I’ll let you know when you’re all good!
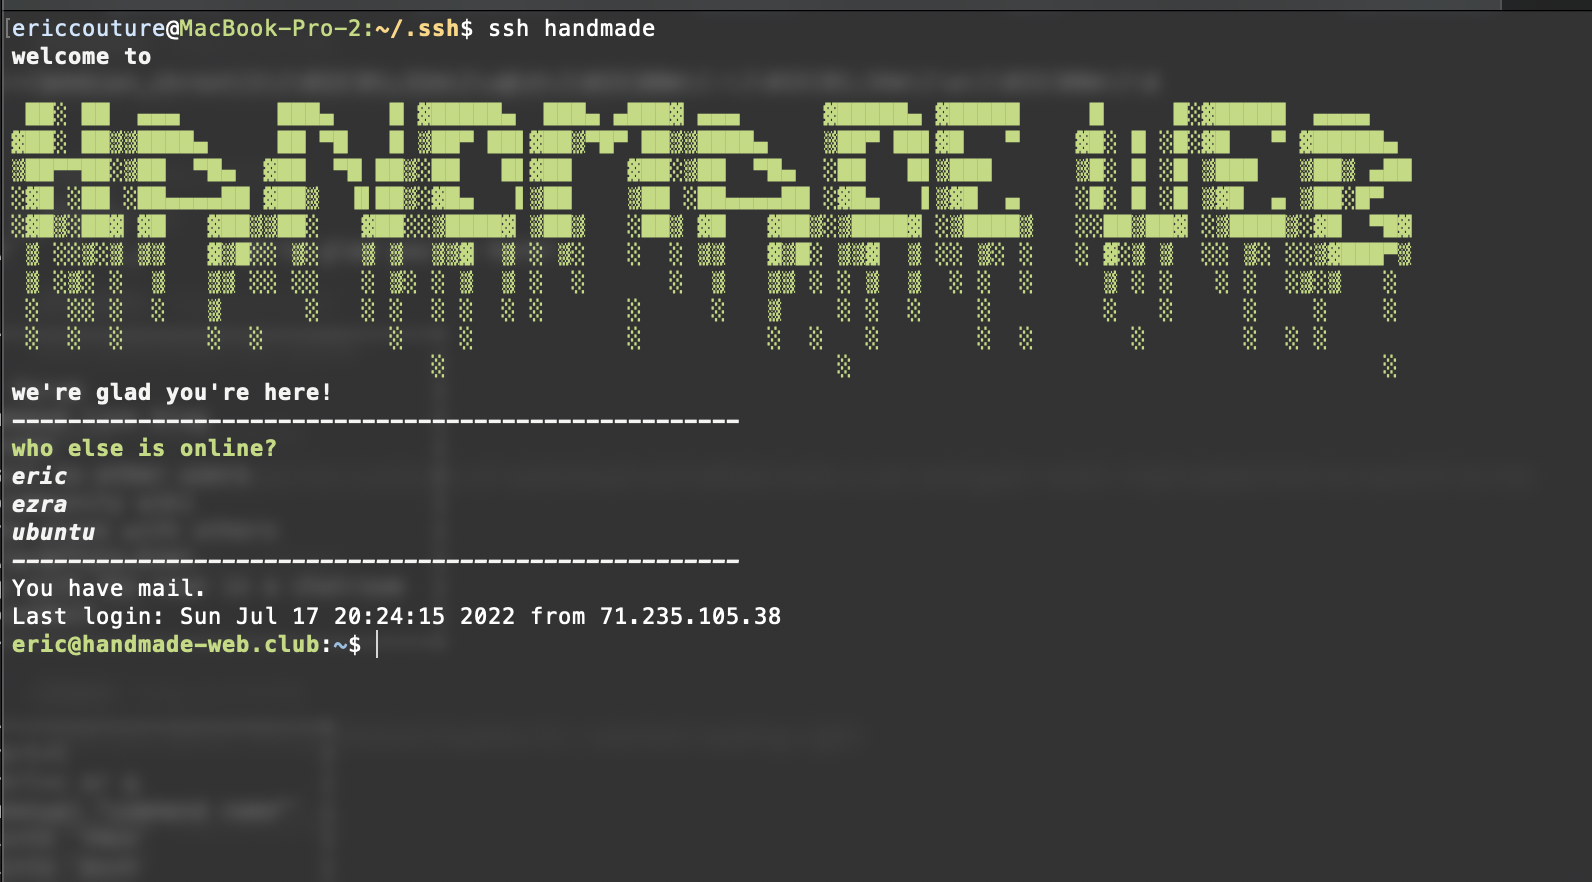
I will then get you all set up on the server, creating a user account for you, generating all the corresponding files and letting the system know that you’re coming. Then you can actually SSH into the server! The best way to explain how this works is to lay out the command I use to login, and explain it piece by piece.
ssh -i ~/.ssh/handmade-web eric@handmade-web.club
ssh: This is the actual command part of our command. It tells the terminal that we are trying to start a Secure Shell connection to another computer
-i ~/.ssh/handmade-web: This is our first usage of an argument! Go you! The -i argument tells the command that we are passing in an Identity File, we then point the command at where that file is located. As with everything in the terminal, arguments are relative to your current location in the filetree. If we were already in the ~/.ssh directory we wouldn’t have to include that bit in the command, and could just point it at the file with -i handmade-web, provided that that is what your private key file was named.
eric@handmade-web.club: This bit then tells the server that we are trying to log in as the user eric on the server located at the web address handmade-web.club. When you send over your public key to me, I’ll also ask you what you’d like your username to be on the server, it can be whatever you want it to be! I chose my first name just so you all know who I am when I do things, but there is no pressure to do the same on your end.
Once we’ve typed it all out, we can hit enter, and provided all the information is right, and I didn’t screw anything up on my end, the login process will start! The remote server will first compare that private key file we passed in with the ssh command with the public key that it already has in the system, and see if we are in fact who we say we are. If we are, congratulations, you’ve just established your first SSH connection and you’re now logged into the brand new handmade web tilde server! If all goes to plan, you should be greeted by a screen that looks something like this.
Now what?
So you’ve just logged into your first remote server, what do you even do now? Well, you can start creating things! Let’s get our bearings first, if you type out a good ol’ ls we can see what we’re looking at.
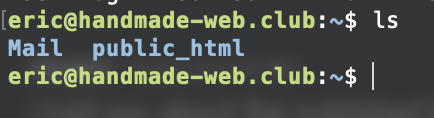
The ~ in the terminal prompt shows that we’re in our own home directory, which is different for every user on the server, all the user files are actually located somewhere like /home/[username] on the server, but that doesn’t really matter to anyone but your admin. By default in your home directory you have two directories. The Mail directory isn’t really important right now, we have an internal mail system on the server, but I will explain that in a bit. Just don’t touch it for now. The real star of the show here is your public_html directory. If we navigate into that directory (by typing cd public_html) and then list the files there (ls) you’ll see that by default there’s an index.html file waiting for you. This is where the really fun stuff begins.
If you navigate over to http://handmade-web.club/~[your username] using your browser you should see something cool waiting for you.
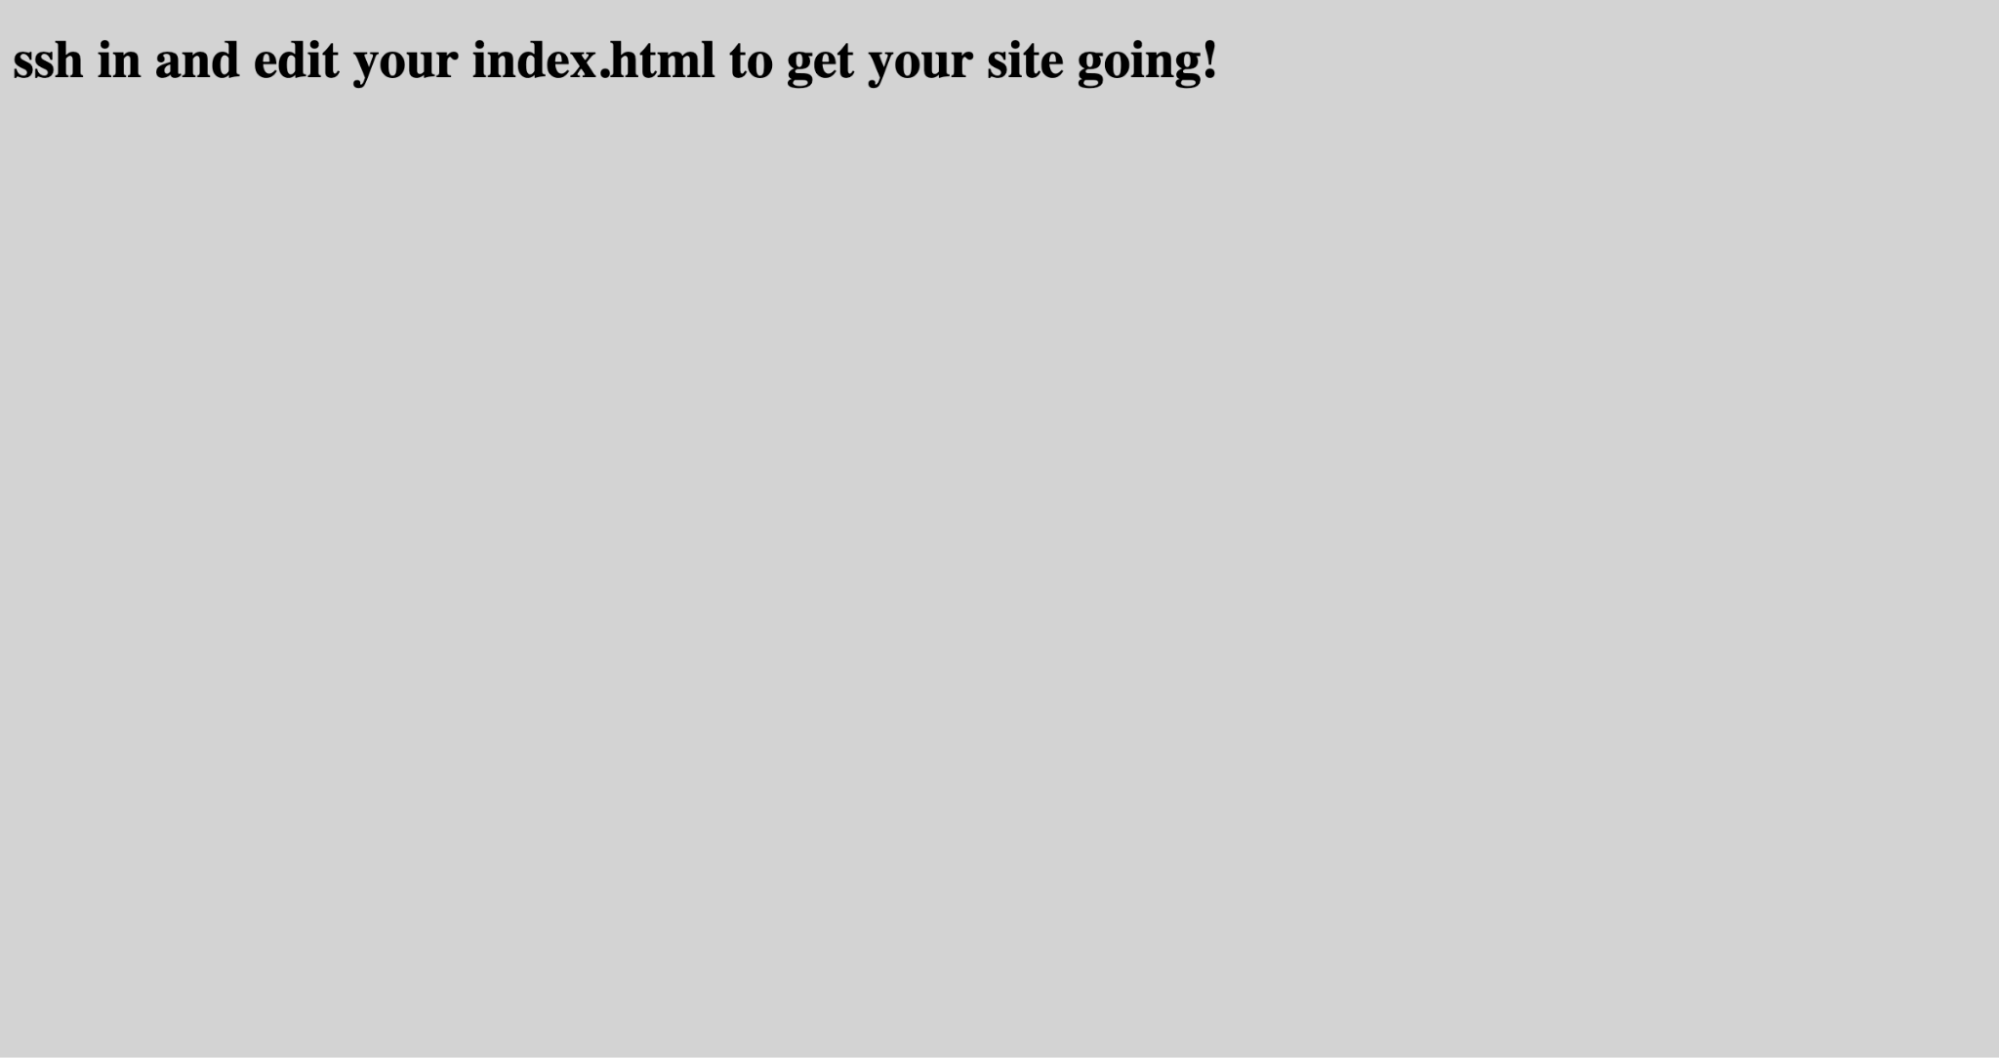
Well, cool to me, because I set this up and it’s finally working. But, you get the point. You have your very own site hosted on this collaborative server with all the rest of us! Anything in your public_html directory will be openly accessible on the web, hosted on our collaborative domain! The public_html directory acts like a global root folder, and you can create directories within it to create additional pages and the like, the same way that your class-site repository is acting on github currently.
But how do I actually make my website?
Because all these files are stored on a remote server, you cannot simply edit them on your local machine and save them and have it updated, unfortunately. Also unfortunately, we’re also working with a system a bit more primitive than Github, we don’t have a client that we can easily push updates to our server with a single click. We have two options, both with their own pros and cons.
Terminal-based text editors
You can actually edit all of your files from entirely within the terminal if you’d like. Because the terminal has no mouse interaction capabilities this can get a bit weird and complex, but it’s very easy to start with. There are several terminal text editors, each with their own quirks, but the easiest one to understand coming from a traditional GUI based text editor is nano. You can open it on a file you’d like to edit with nano [path to the file]. So if we were in our public_html directory and wanted to edit our index.html file you’d type nano index.html. This will completely change the look of our terminal and it’ll look something like this.
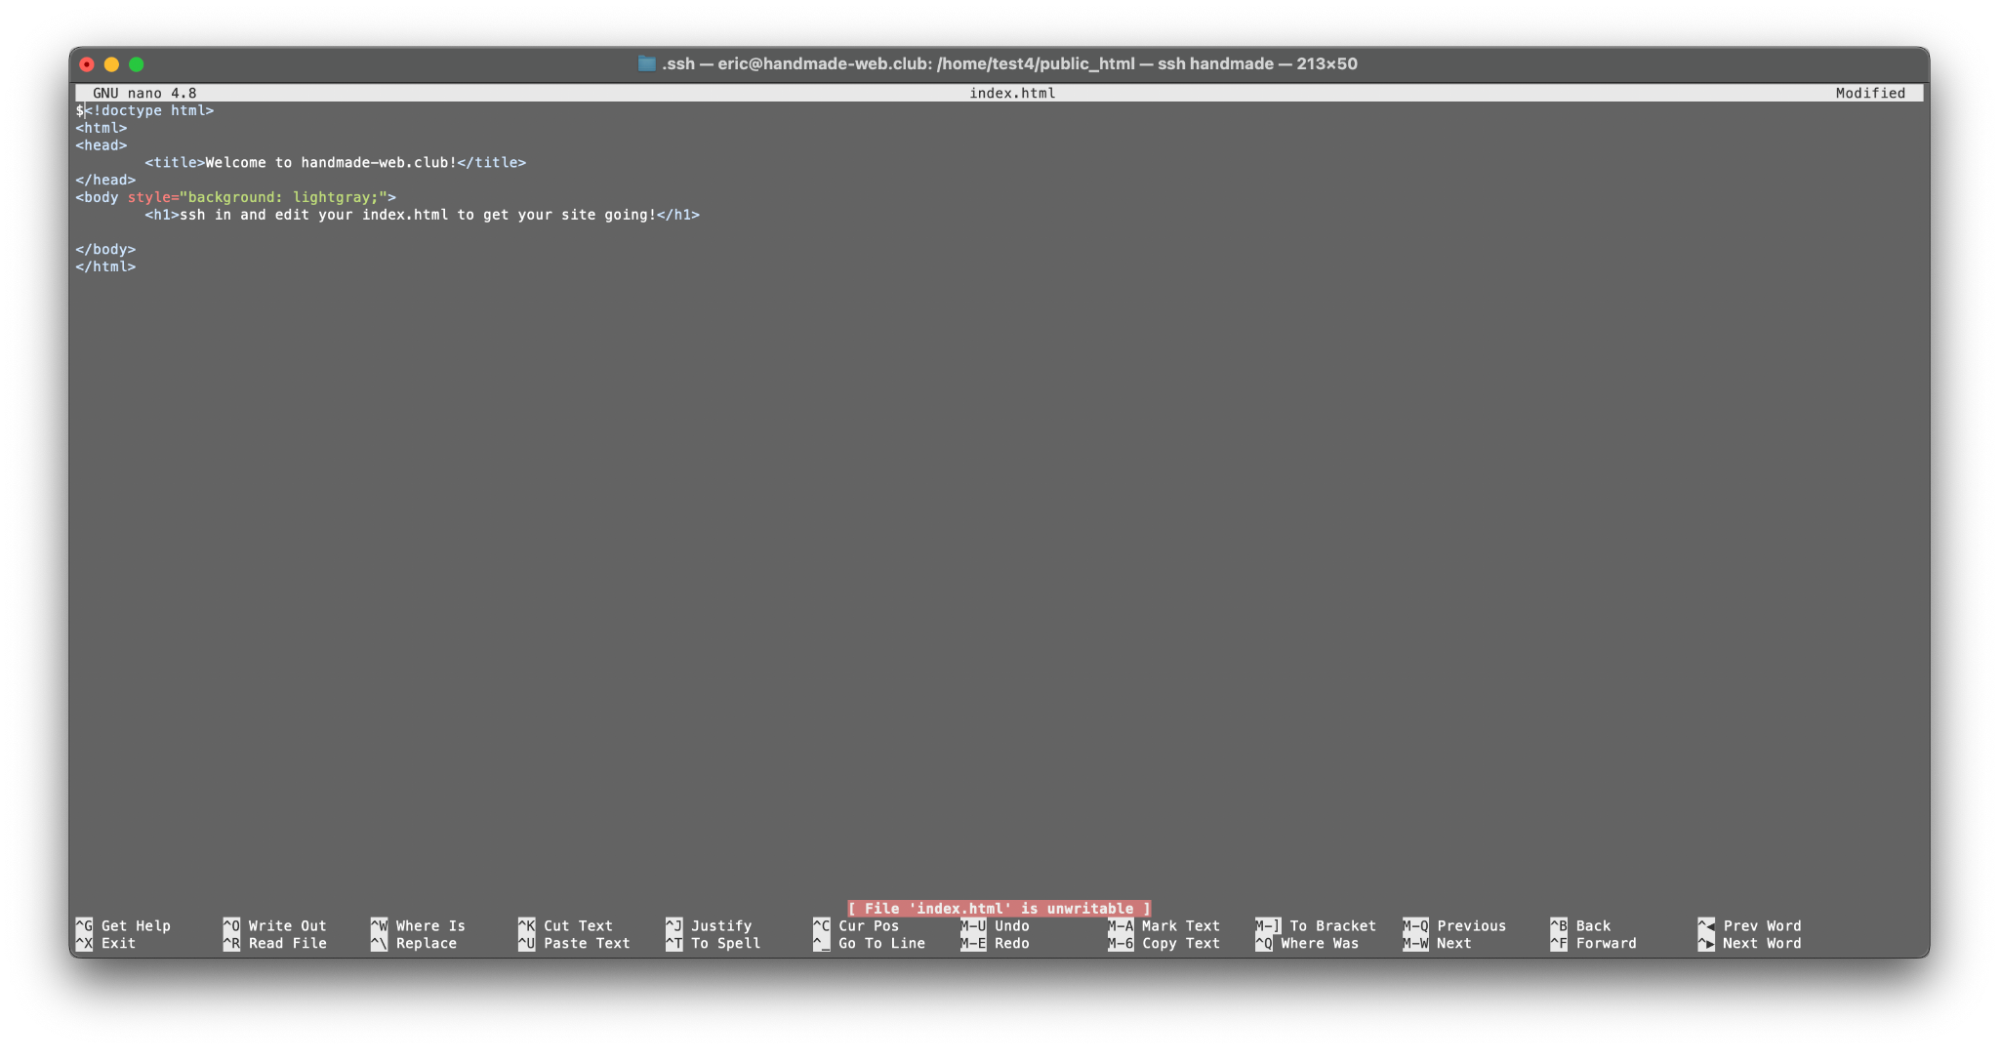
Now I bet this is starting to look a little familiar, yeah? You’re now editing your own index.html file! Nano is the most intuitive text editor available on the server, it functions like a lot of other text editors, just without a mouse. You use your arrow keys to navigate around, and there’s a guide to some of the basic commands at the bottom. nano is actually fairly well featured all things considered, it has automatic syntax highlighting, which is actually very helpful. But, there is no sort of auto-complete or any of the more advanced features you’d see in a desktop text editor. It may seem a little hard to work with at first, but a lot of people really like it! nano is actually really powerful, and if you want to get into it, there’s a whole lot of customizability available right under the hood.
But for right now, we’re not gonna get into that. Once you’re done editing your file for right now, you can exit with the command listed on the bottom: ^X. That might be a bit confusing, but the ^ simply stands for the control key. On Windows, this is the control key, on macOS, this is also the control key (note, NOT the command key! god bless you UNIX operating systems). It will then prompt you if you’d like to save the file, hit the button corresponding to your choice, and you should be back on the command line we’re used to!
For a more in depth beginners tutorial to nano, see the guide here.
There’s a large number of available text editors for the terminal, and they all have their own quirks, strengths, and weaknesses. On this server, we also have vim and emacs installed. They are both significantly harder to use, but lots of people actually prefer them over nano for many reasons. Guides for vim and emacs linked here if you’re curious.
SFTP
SFTP, standing for Secure File Transfer Protocol, is a method for uploading and transferring files to and from a remote server over an SSH connection. It will allow you to transfer files that you edit and save locally directly to your directory on the tilde, which is incredibly useful. In this way, it allows you to treat your directory on the tilde a bit like the Github repository we’re hosting all our work on currently. The downside being that you have to transfer files all manually, and it does not sync all your files between the locations, so you have to keep track of what’s changed where. Because SFTP all happens via the terminal, it is possible to automate many of its behaviors with shell scripts. This is incredibly powerful, and can simulate a Github repository if you go hard enough at it. But, I do not know enough about it to get into that here.
You will initiate an SFTP session with the exact same command we did to initiate the SSH session earlier, just replacing ssh with sftp. I will not go into the details of how this works here, but I will instead link a good guide here.
One thing to note, if you plan on uploading images to your site, you will have to use SFTP. Which is the main reason I bring it up. Reminder to watch your image file size once again, we are operating on fairly limited storage here!
Once you're settled...
These things are here for you to look into if you really want to, none of them are super necessary for regular usage of the server or for editing your webpages but they can be very helpful if used.
Tmux
Standing for Terminal Multiplexer (which is one of the cooler two word phrases possible in the english language) allows you to split your terminal window into multiple panes that allow for simultaneous and side by side work. This is particularly useful to edit both an HTML file and a Stylesheet at the same time for instance.
Tmux also allows you to start different terminal sessions and connect and disconnect from them at will, this allows you to run projects in the background or when you log off the server. This is particularly useful for IRC chats, because you don’t lose all the previous chat messages on logout.
A very very basic guide is here, a more advanced one here.
Cron
Cron is a super handy tool for automating tasks in the background, I have it running a bunch of regular tasks already. I don’t know if there’s much that you’d need it for at this moment in the server’s development, but if you want to try it out and experiment with it, it’s there!
A basic intro to the program is here and the syntax generator I use is here.
Dotfiles
Dotfiles are the initially hidden customization files that exist for almost every single program that can be run on the server. One of the arguments available for the ls command is -a, which allows you to see all of the files in a directory, not just the ones visible by default. If I run it in my home directory you’ll see there’s a whole lot more there than you initially thought.

You will not have all of these files, some of them are specific to the fact that I am an admin on the server, and will not be visible in your own home directories. But, as you can see, all the files that start with a . are hidden from a normal directory listing. These files and directories all contain useful information and settings that you can use to heavily customize your experience! The .bashrc file for instance can be used to totally change the look and behavior of your console, and the .viminfo file can be used to totally customize the behavior of the text editor vim.
Experienced UNIX users will often share their heavily customized dotfiles on a Github repository or something similar and you can download them and experiment with them to see what you like!
Two of these files that I want to point out in particular are .project and .plan. These two files are actually default UNIX files and have been around for a long, long while. Time to introduce another command, the unfortunately named finger [username] command allows you to get some information about other users on the server. The .project and .plan files show up in responses to that command. The .project file is meant to be a shorter summary of what you are currently working on, but the .plan file can be as long as you’d like it to be. As such, people used it as a sort of primitive blog around the advent of UNIX systems. Open both of these files in your text editor of choice and go to town! Here’s an example of what it looks like.

Communicating with each other
One of the really fun parts about working on a shared server is getting to communicate and hang out with the friends on the server at the same time. Hang out with each other in the terminal! It's a blast, I promise
IRC (for online friends)
IRC stands for Internet Relay Chat and is a text-based instant messaging protocol that's been around since the earliest days of the internet. It's a system of servers that allow people all over the world to connect and speak to each other across, it's very handy. Since the advent of more convenient messaging apps in literally thousands of forms, the usage of IRC has greatly decreased. However, it still very much has a form in many more technical spheres and there are several globally utilized IRC networks that have hundreds of thousands of users.
On the locally handmade web tilde we have a local IRC network running, meaning it's only accessible to other users on the server, and our IRC channels are not viewable or joinable on the open internet. It's a cool little trick and really handy. You can join the server by simply typing irc in your terminal, simple as.
By default you'll join the main channel for the server, #handmade-web. This channel is probably where the main body of conversation will occur on the server, and you may never need to leave it! But should you want to, you can join any channel you'd like by typing /join #[channel name] into the text input box in the chat client and hitting enter. If that channel does not yet exist, it will be automatically created! You can make channels for anything that you may want to discuss, or just a place for you and your friends to hang out if the general channel gets too crowded. Others can join your channel with the same command! You will also notice that when you join a new channel, it gets added to a list on the side, this shows all the channels you are currently active in. You can switch channels by using the same join as before.
IRC also allows you to start direct messages with other users, (if you've read through this guide multiple times you might notice that this replaces the need for the write command that was previously in this guide in this spot). You can start a direct message with someone by typing /query [user]. After a direct message is opened you can switch to it with the join command in the same way you would with channels. All channels and direct messages can be closed with the /close command! A quick start guide to get you going with the chat client we have installed on the server, WeeChat, can be found here. You can ignore the bits about connecting to servers, as the irc command I mentioned earlier automatically connects you to the locally hosted server. If you so choose however, you can connect to external IRC servers through WeeChat, I cannot see a reason why you would use the client hosted on this server to do so however.
WeecChat is incredibly customizable and configurable, and if you find enjoyment in lots of tweaking to make it function exactly how you want it to, a full guide can be found here. There is a lot there that is going to be irrelevant to our situation, but there's more informatin than you could ever need on how to adjust things.
One downside to IRC is that it does not store previous messages on logout. As such, if you completely exit IRC and then log back in the next day, you will not be able to see what was said in the time you were gone. HOWEVER! This is where Tmux comes in! If you open an IRC instance in a Tmux session, that IRC instance will stay open and logged in even if you yourself log out of the server. And, when you log back in, all the messages will be there! Handy isn't it?
Admin note, the IRC server is in its very infancy as of the most recent update of this guide (07/20/22) and as such may be a bit unstable and or have some weirdness. Please bear with me.
Email (to contact your offline friends)
We have a local email system you can use to send messages to other folks on the server! It’s a bit complicated on how to use it, so I will leave a couple guides here, but an important thing to note is that everyone’s emails are [username]@handmade-web.club (for instance, my email on the server is eric@handmade-web.club). These emails are only accessible on the local server, and will not work if you attempt to send them email from somewhere outside the server (ie: from your school gmail or something like that).
A guide on how to use the mail command within the system lives here and a (very in depth) guide to use the email client we have on the server, mutt, lives here.
The less practical stuff, games, fun things, etc.
At the moment, I have a couple fun things installed on the server, some games and some utilities. They’re fun! Mess around with them. More will come with time and as I discover them.
Botany
Botany is a fun little command line game that allows you to grow your own little plant in the terminal :D. You can view others’ plants, water your own, and feel like you’re actually taking care of something, even though it’s literally just a random grouping of characters on a screen. Anyways. Type botany to get started and plant your first seed! More info here.
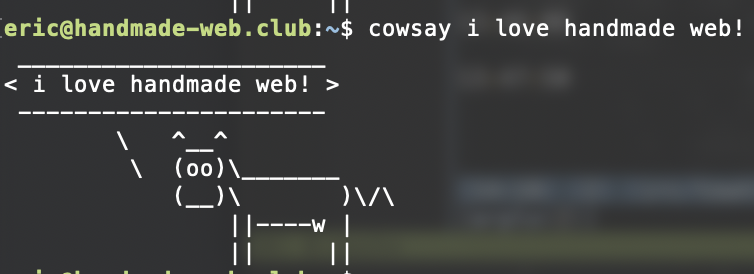
Cowsay
Cowsay is a classic UNIX utility that does exactly what it says on the package. It gets a little ASCII cow to say whatever you’d like it to. Just type cowsay [message] and it’ll spit it right back at you.
Fortune
Is another classical UNIX utility that does again, exactly what it says on the package. It will generate a pseudo random fortune for you, like your very own terminal fortune cookie. Use it by simply typing fortune. Importantly, you can also pipe the output from fortune directly into cowsay, simply type fortune | cowsay and you’ll have your very own prophetic command line cow.
In conclusion + some resources
Well, I hope you got at least something from this. I know it’s about 5500 words of technical nonsense, especially if you’ve never worked with this stuff before, but I promise, it’s not that hard! Use your resources, don’t get frustrated, and keep trying! I’m excited to help you start on your terminal journey, hopefully it’s a long and fruitful one! Before I sign off, I have a couple notes of things to take a look at!
LOOK AT SIMILAR SERVERS
Most if not all of the tildes currently in operation list all their users and link to their websites on their homepage. Look through these and get a better idea of what you can do with a low-tech site like this! The list of servers officially a part of the tildeverse is available at tildeverse.org (plus a ton of other very useful resources). I particularly recommend looking through the user lists for tilde.town and tilde.club, although there’s a lot of empty pages, once you get through them there’s some insanely cool stuff on there. The corresponding wikis for a lot of other tildes can also be a wealth of information. They are specific to the tilde they come from obviously, so there’s a fair bit of information that’s not going to be relevant, but a lot of the introductory guides are still very useful.
Google is your best friend
We briefly went over this in class, but the number one most useful skill when it comes to writing code is knowing how to google your questions. This is actually ESPECIALLY true when it comes to the terminal. It’s been around far longer than many of the programming languages we use today, and many of the resources that exist for it currently still are perfectly relevant! But, googling “how do do this thing linux” will get you the answer you’re looking for on stack exchange 90% of the time. Get used to it!
But with all that out of the way, thank you all for reading, I’ll see you on the tilde!
Postscript and extras
Some additional tildes history
Allow me to ramble for a bit. The word “tilde” is going to come up a fair bit in this scene, simply put, it’s literally just another word for pubnix. It stems from the founder of the most modern iteration of this scene, which started in around 2014 with Paul Ford’s tilde.club. He explains in detail where the name came from in the glorious writeup of the night that he created tilde.club, link here. Fantastic piece of writing, highly recommend it. The community itself came to be known as a “tilde” (the ~ character itself is pronounced TILL-duh, whereas its till-DEE when referring to a community).
The original tilde.club spawned many similar servers of various names, including my own home tilde, tilde.town. Most of the names include the word “tilde” in some way, but others don’t, there are no rules here. They all however, try to encompass the same ethos that Ford put forward when starting tilde.club. He wanted to create a space for lofi creation, collaboration, and community. They’re spaces to return to the old web, and to learn and teach about everything under the sun. Tildes are radically inclusive spaces, and welcome people of all technological skill levels. It’s really a beautiful, beautiful thing.
I am claiming the tilde moniker for our little server here, and I would encourage you all to try to embrace all that that means. Use this as a space for experimentation and learning! A sandbox for your every UNIX-based whim, go wild!
An SSH config shortcut
There's actually a super easy way to get around having to type the whole ssh command we spoke about earlier each time you want to connect to the server. From within your .ssh directory on your local machine, create a new file simply called config. You can do this by creating it and then editing it (touch config, nano config) or just simply type nano config and when you save and exit the file will be created.
Within that file you want to follow this format, obviously replacing the missing pieces with their relevant data. A note: the indents are not necessary for this to work, I just prefer them for readability. BUT! The caps in the first bit of every line ARE. The shortcut will not work without them.
            Host handmade
	            Hostname handmade-web.club
	            User [username]
	            IdentityFile [path to private key]
You can also replace the handmade on the first line with whatever you want, that is the shortcut phrase you will type when you go to ssh into the server.
Once the config has been saved, you can now connect to the server by simply typing ssh handmade (or whatever you set your Host to).
For example, here is the relevant section of my config file:
            Host handmade
	            Hostname handmade-web.club
	            User eric
	            IdentityFile ~/.ssh/school-tilde-user
And I ssh into the server by simply typing ssh handmade. Easy huh? You can also add as many of these entries to your config file as you'd like to make shortcuts for different ssh servers you need to login to!
______________________________
< Reply hazy, ask again later. >
 ------------------------------
        \   ^__^
         \  (oo)\_______
            (__)\       )\/\
                ||----w |
                ||     ||